This guide describes the GeneralSync integration provided by the official Thunderbird add-on. It is divided into the following feature-specific sections:
Note that this document is intended as reference providing some background information on the GeneralSync integration; it is not required to read through this document in order to use GeneralSync. If you are not yet familiar with Mozilla Thunderbird, you might want to check out the official support resources provided by Mozilla as well. Thunderbird features unaltered by the GeneralSync integration will not be covered in this guide.
While starting GeneralSync for PC for the first time, the first-run setup installs the add-on by default. On the next start of Thunderbird, you will get prompted to confirm the installation:
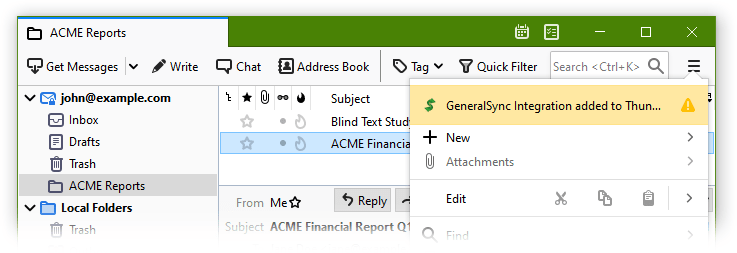
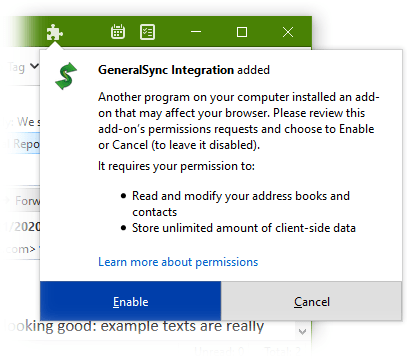
Click on the notification and confirm the required permissions. Note that the list of required permissions will change occasionally and thus may differ from the screenshot above.
If you did not choose to install the add-on during the first-run setup, or switched your Thunderbird profile, you can also install the add-on manually:
This section describes how to use calendars managed by GeneralSync with Thunderbird.
Calendars available through GeneralSync are automatically added to Thunderbird. You can create new GeneralSync calendars through the GeneralSync dashboard.
In the calendar tab, you can edit Thunderbird-specific settings: right-click on a calendar and select Properties. In a new window you can now select various options, including the calendar's color and associated email address. The latter is necessary to properly send and receive invitations for events per E-Mail.
Deleting calendars in Thunderbird has no effect on GeneralSync – the calendar will get recreated until it is also deleted in GeneralSync. Calendars deleted in GeneralSync will get removed from Thunderbird automatically.
If you wish to use an existing calendar with GeneralSync, perform the following steps:
On calendars linked with GeneralSync, you can view version information on each event in the event editing dialog:
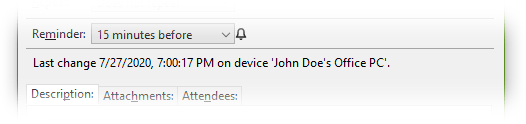
The displayed information consists of a timestamp of the last change, and the device issuing the change. If the device issuing the change is not paired or otherwise has no known name, a technical device ID is displayed instead.
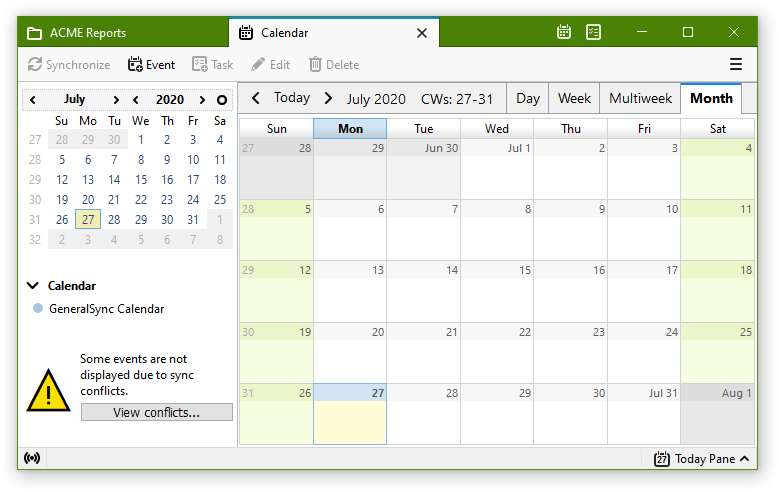
If the same event is changed on multiple devices, GeneralSync cannot automatically determine which change should be kept. The event will thus be in a conflict state, and can't be displayed in the calendar.
Thunderbird notifies you of existing conflicts with a warning sign in the bottom left corner of the calendar tab:
You can view conflicting versions by clicking on View conflicts...:
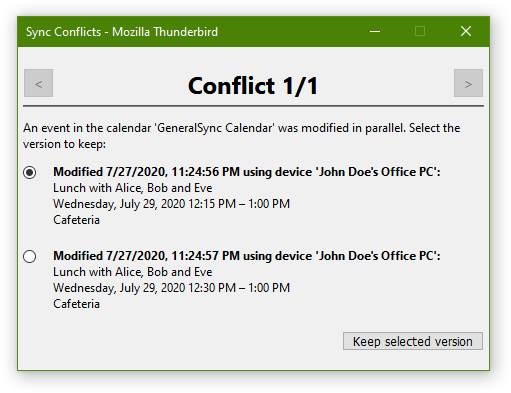
Select the version you wish to keep, and click Keep selected version to save your selection. Your selection will then be synced to other devices automatically.
If you do not wish to select a version right now, you can use the arrow buttons at the top to go to the next conflict, if any.
Thunderbird 102 uses a new address book with major differences in functionality. This guide has not yet been updated for the new version.
This section describes how to use address books managed by GeneralSync as regular address books in Thunderbird.
Address books available through GeneralSync are automatically added to Thunderbird. You can create new GeneralSync address books through the GeneralSync dashboard.
Deleting address books in Thunderbird has no effect on GeneralSync – the address book will get recreated until it is also deleted in GeneralSync. Address books deleted in GeneralSync will get removed from Thunderbird automatically.
You can drag and drop existing contacts into GeneralSync address books. Thus, the easiest way to move contacts from existing address books to GeneralSync is to select them (Ctrl+A to select all entries) and drag them onto a newly created address book. Hold Ctrl while dropping them if you want a copy of the contacts to remain in the old address book.
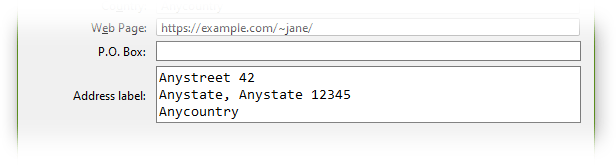
For contacts stored in a GeneralSync address book there are minor differences to regular contacts:
If the same contact is changed on multiple devices, GeneralSync cannot automatically determine which change should be kept. The contact will thus be in a conflict state, and can't be displayed in the address book.
If any of your address books contain conflicting contacts, a warning is shown below the list of address books:
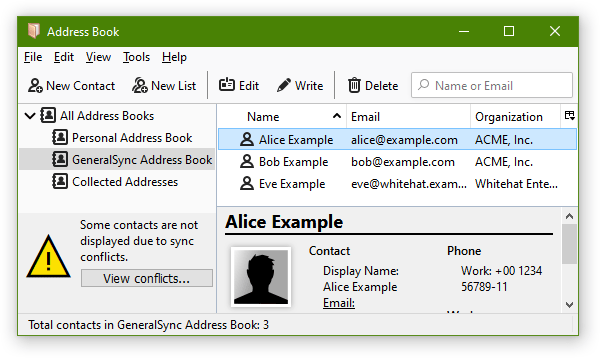
Click on View conflicts... to open the conflict resolution window:
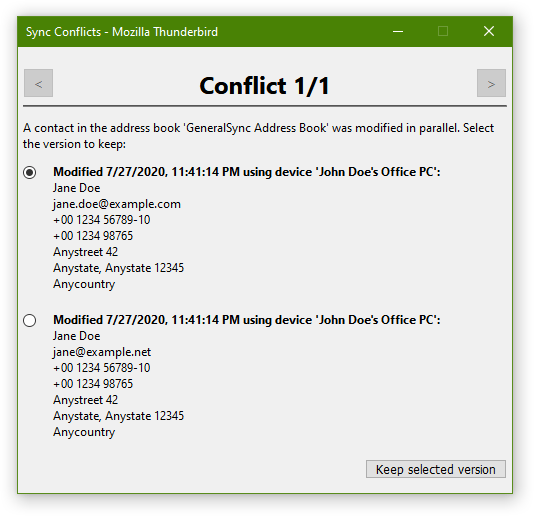
You can then select the change you wish to keep and click Keep selected version. To skip to a different conflict without resolving it immediately, you can use the arrow buttons at the top of the window. After resolving a conflict, its resolution is synced back to all other devices. You thus do not need to resolve the same conflict twice.
Feel free to contact us if you have further questions or suggestions regarding this guide or GeneralSync itself.